How to Create a New Project / Import existing C code for the Code Composer Studio V5
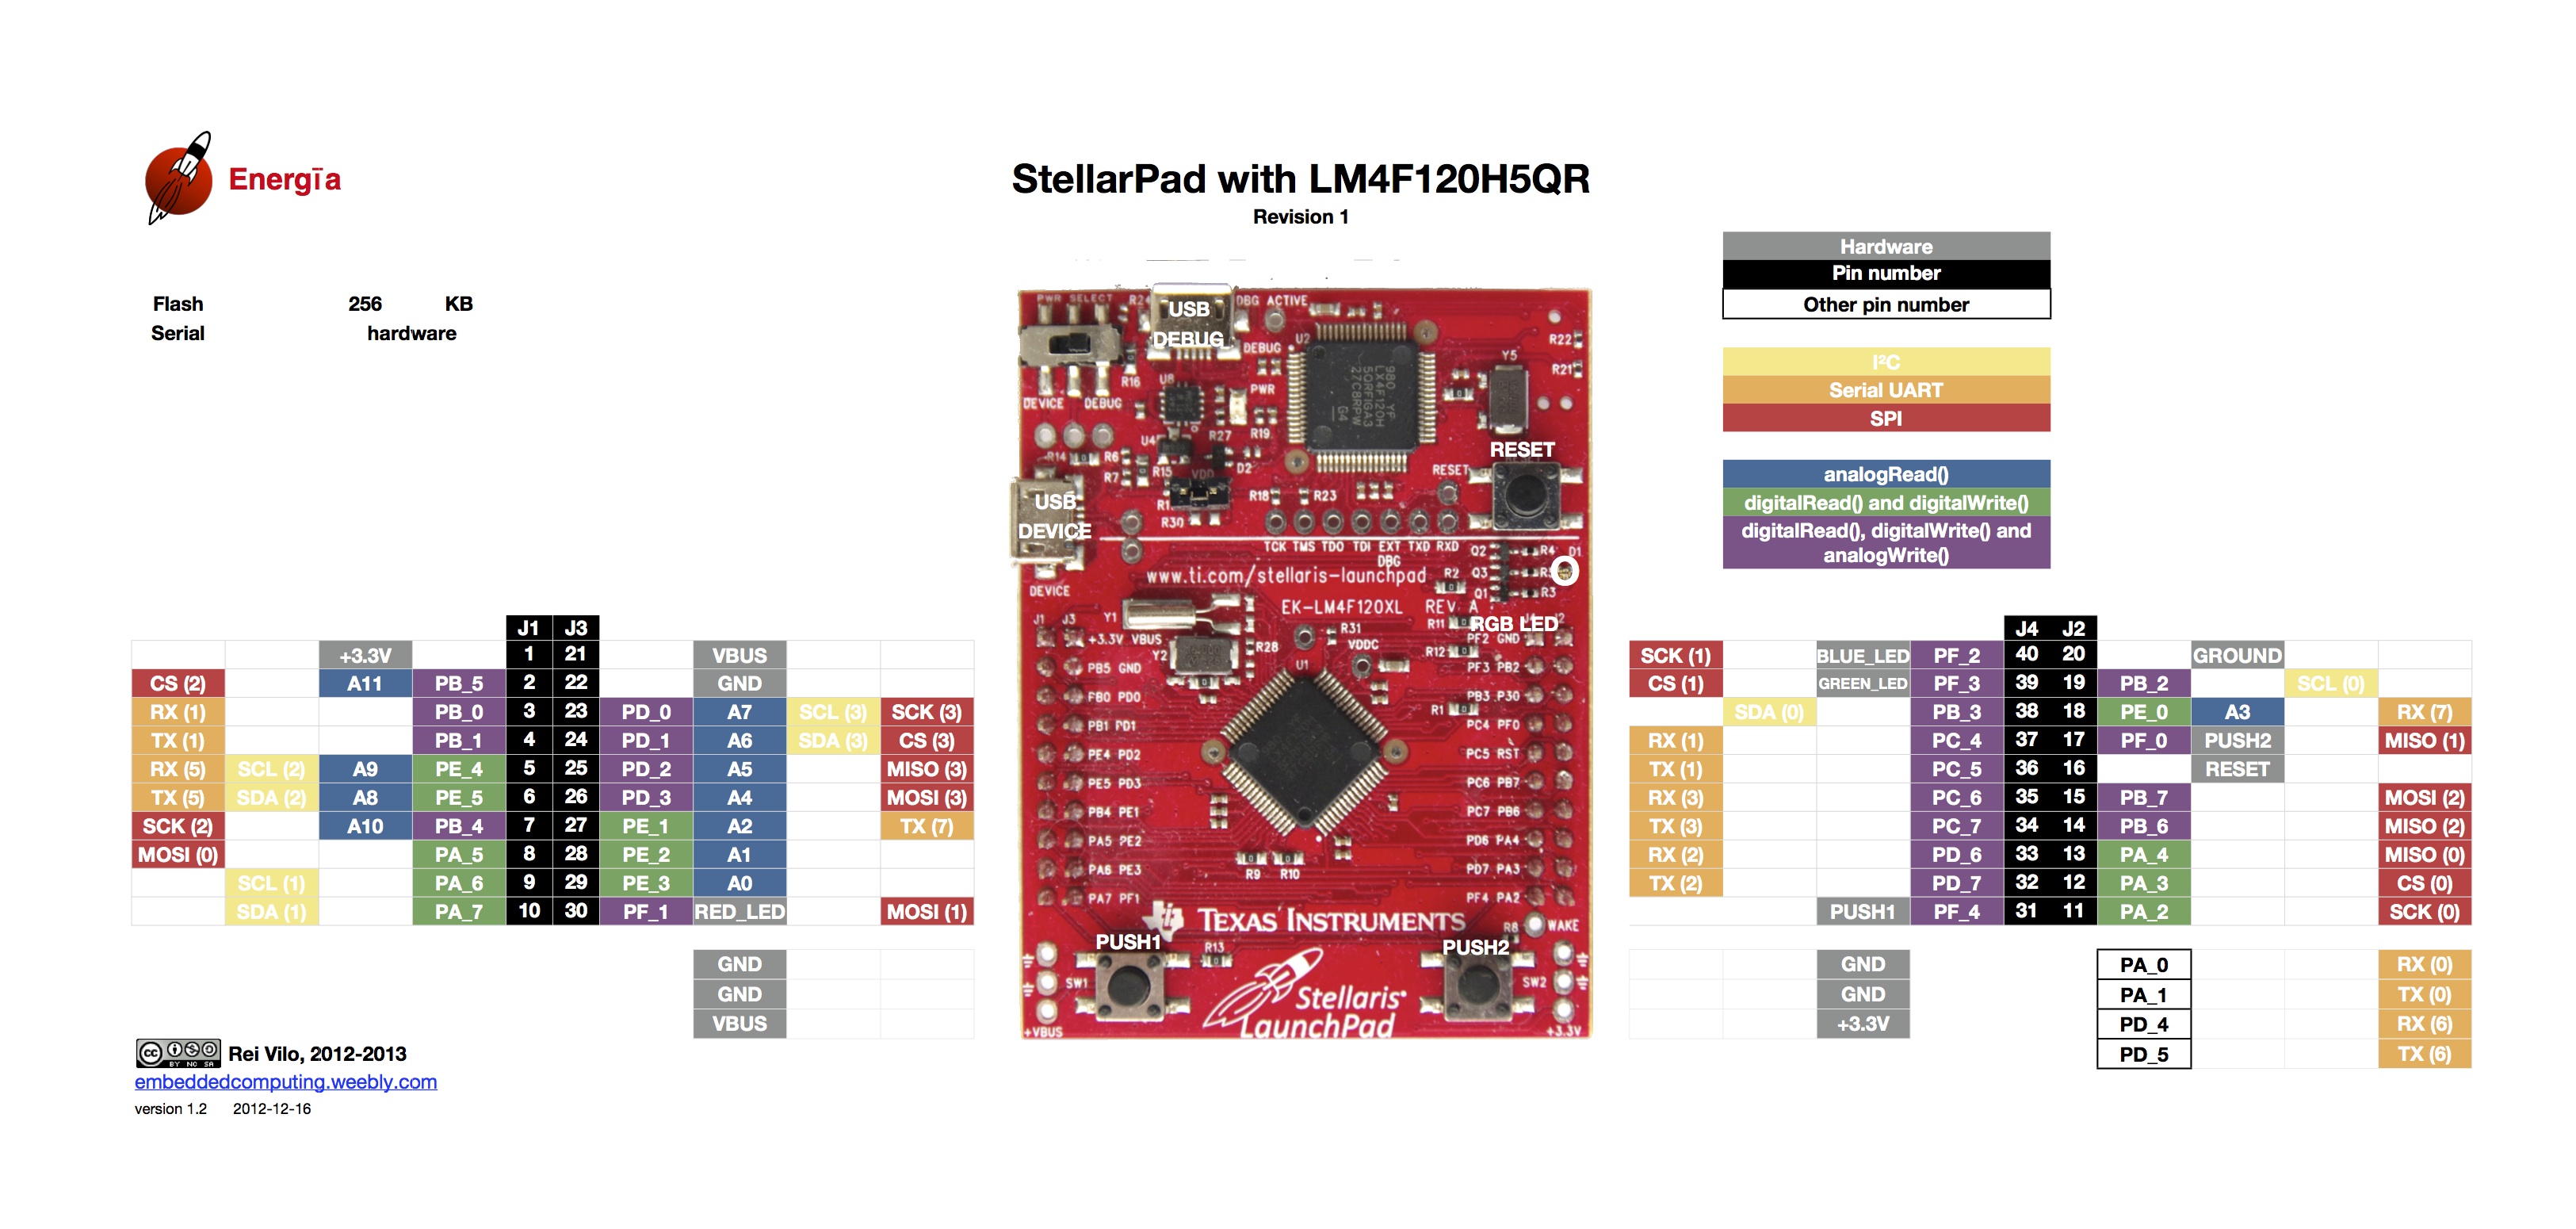
NOTE: this example is based on the LM3S1968 board, however the instructions could be easily modified to accomiddate any Stellaris packaged microcontroller by substituting 1968 for whatever board you may be using.
- Open Code Composer Studio
-
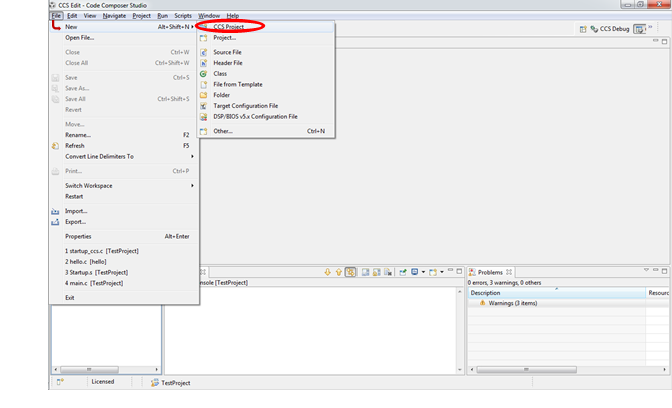
Create New CCS Project
File->New->CCS Project
-
Fill in New Project Information
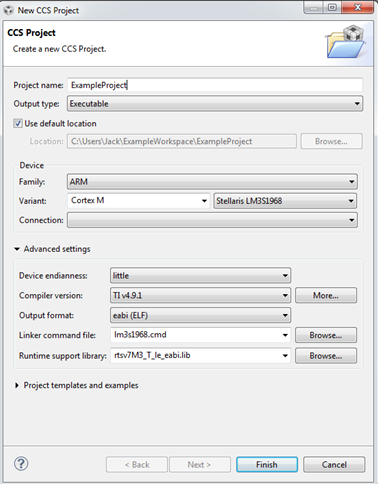
NOTE: make sure these settings are correct; pay special attention to the ‘Linker command file’ and the ‘Runtime support library’.
-
Add ‘start_ccs.c‘ and ‘target_config.ccxml‘ to project sources
NOTE: the ‘start_ccs.c’ file can be found in the \StellarisWare\boards\ek-lm3s1968\hello example project. In CCS you use ‘startup_ccs.s‘, in Keil you would use ‘startup.s’.
The ‘target_config.ccxml‘ file can be found in \StellarisWare\boards\ek-lm3s1968\hello\css

If you already have ‘driverlib’ in your workspace you can skip ahead to step 5
-
Import Project Dependencies
import ‘driverlib’, ‘usblib’, and ‘grlib’ from the StellarisWare/ directory
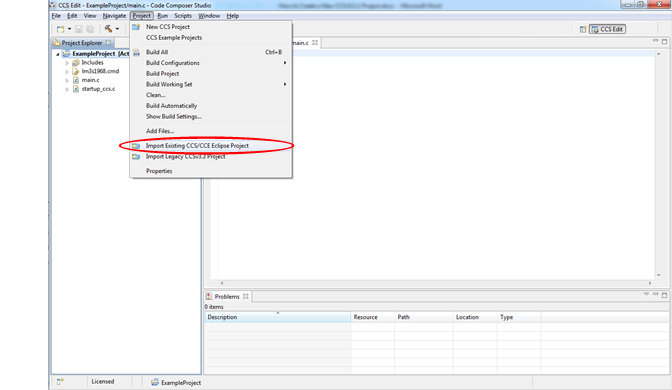
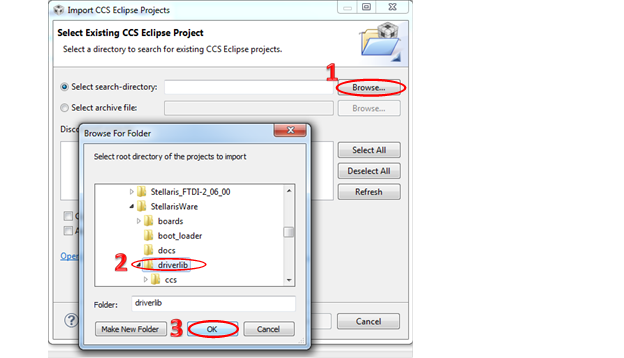
Repeat above step for ‘driverlib’, ‘usblib’, and ‘grlib’ from the StellarisWare/ directory
-
Set Project Dependencies
You have to define where your libraries are in two parts.
PART 1:
Right Click Project ->Properties
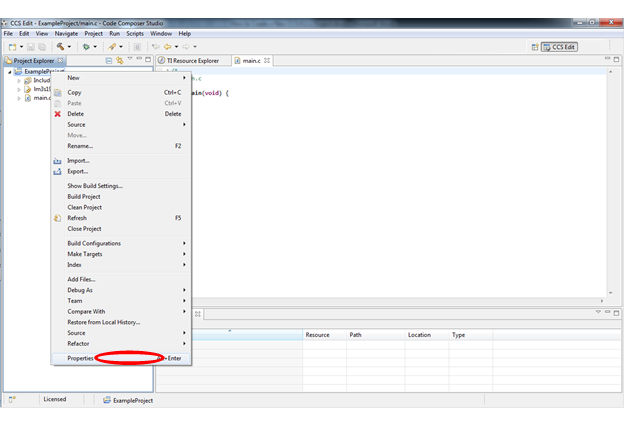
Build->Dependencies Tab->Add Button->select projects from workspace
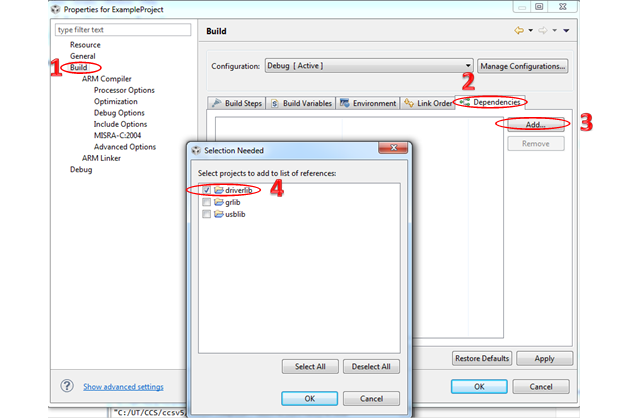
NOTE: ‘driverlib’ is required for all projects.
PART 2:
Project Properties ->Build ->ARM Linker ->File Search Path ->Include Library File
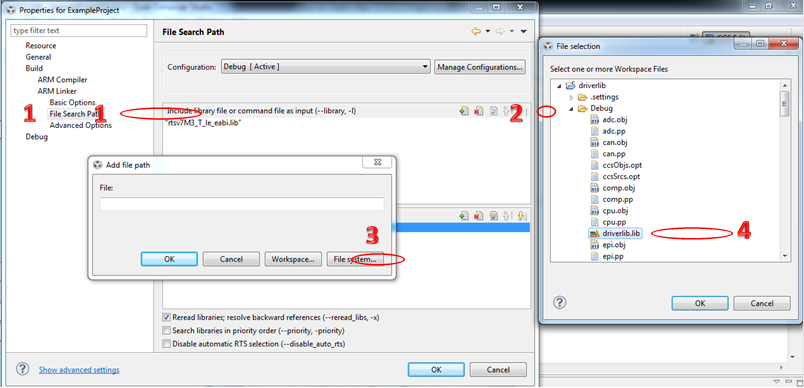
NOTE: ‘driverlib’ is required for all projects.
PART 3:
Project Properties ->Build ->ARM Compiler ->Advanced Options -> Language Options
->Enable support for GCC extensions
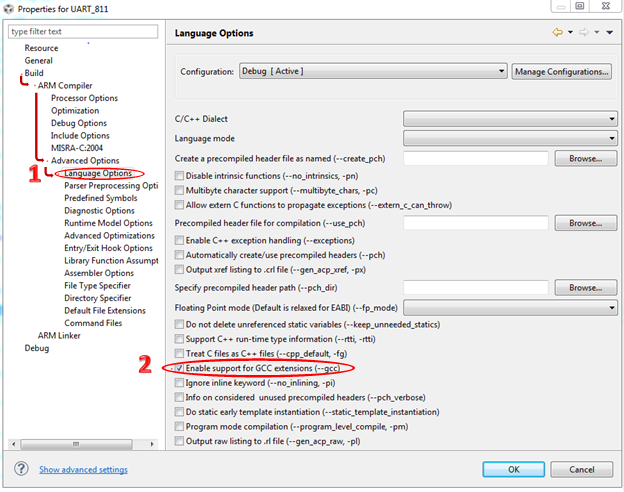
NOTE: this is done to support weak linkage in the startup_ccs.c file, also it’s generally a good idea for compatibility with other code
-
Add Post-Build Command from existing projects
Copy the following into the Post-build steps Command space
“${CCE_INSTALL_ROOT}/utils/tiobj2bin/tiobj2bin.bat” “${BuildArtifactFileName}” “${BuildArtifactFileBaseName}.bin” “${CG_TOOL_ROOT}/bin/ofd470.exe” “${CG_TOOL_ROOT}/bin/hex470.exe” “${CCE_INSTALL_ROOT}/utils/tiobj2bin/mkhex4bin.exe”

-
Modify Include Path
Add desired include paths
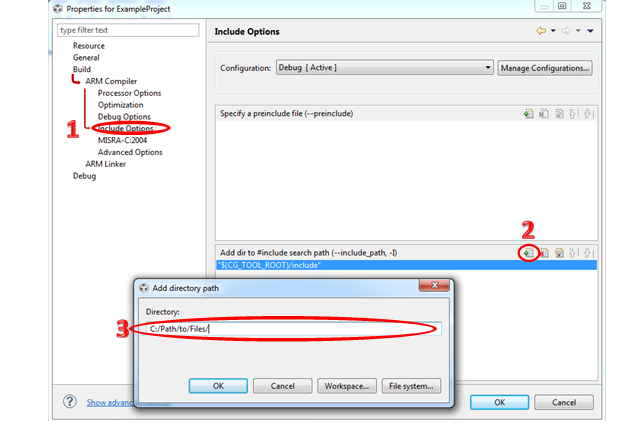
NOTE: I recommend adding the ‘driverlib’, ‘inc’ , ‘utils’, and ‘boards/ek-lm3s1968/drivers’ directories for whatever project you are using as these contain the most commonly used files.
NOTE: This method can be used to solve any include errors for files that can’t be found in any project.
If your workspace has the folders in it: Or if you’re using ValvanoWare
“${CG_TOOL_ROOT}/include” “${PROJECT_ROOT}/../..”
“${WorkspaceDirPath}/” “${PROJECT_ROOT}/../../”
“${WorkspaceDirPath}/inc” “${PROJECT_ROOT}/../../driverlib”
“${WorkspaceDirPath}/utils” “${PROJECT_ROOT}/../../utils”
“${WorkspaceDirPath}/drivers” “${PROJECT_ROOT}/../../inc”
“${WorkspaceDirPath}/driverlib”
If you have StellarisWare Installed:
“C:\StellarisWare”
“C:\StellarisWare\utils”
“C:\StellarisWare\driverlib”
“C:\StellarisWare\inc”
-
Build All Projects
Highlight all projects -> Right Click->Build
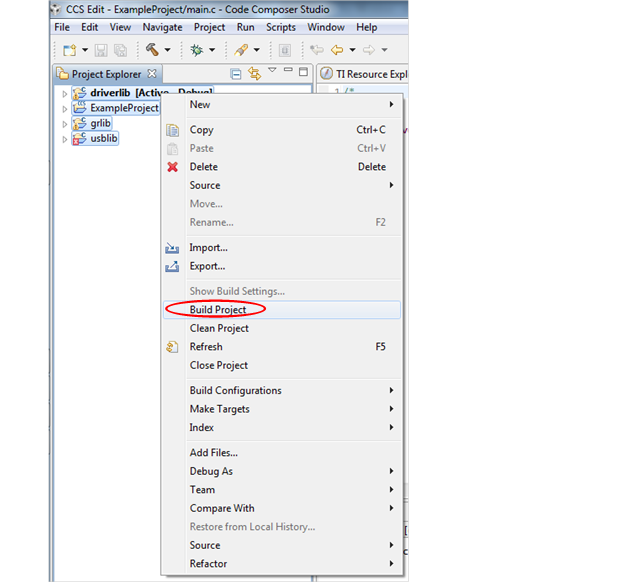
A green status bar will pop up while the project build
Your side bar should look like this if everything went well.
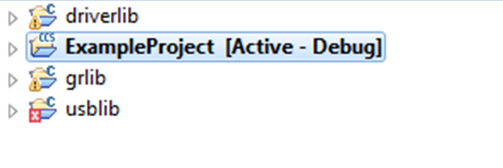
NOTE: there may be 2 errors in ‘usblib’ on ‘USB_HOST_IN_STATUS‘ and ‘USB_HOST_OUT_STATUS‘, you can ignore these for the time being. Any other errors are a problem. In the case of other errors you have either not set the dependencies correctly or not set the include paths correctly. Please go back and redo these steps.
NOTE: you might get 3-4 warnings that look like
Invalid project path: Duplicate path entries
And
Invalid project path: Include path not found
This means that in step 7 you added some redundant paths, usually it means you added the both the StellarisWare absolute paths and the ValvanoWare relative paths. You can either edit the path variables getting rid of the redundant paths, or you can leave them and ignore the warnings, the choice is yours.
-
Add Code
Either add source files or write new ones. Make sure to name the file with the ‘main()’ function ‘main.c‘
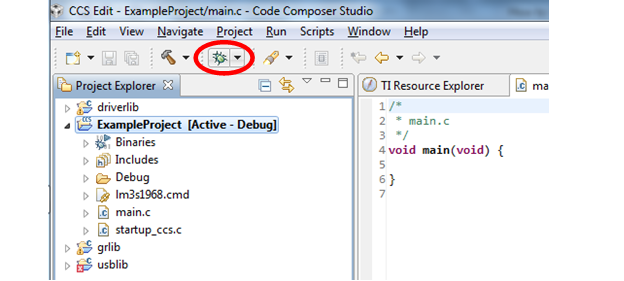
- Load onto Board
- Build Code
- Click Debug icon
- Watch code load onto board
- Run code.
Congratulations!! You have successfully converted / built your first project in Code Composer Studio. Go forth and create great things!!